This is a new topic in 12.03.
This is a new topic in 12.04.
Content highlighted in yellow is new in 12.03.
Content highlighted in blue is new in 12.04.
The company order rules differ according to region. The numbers in the offset fields refer to calendar days, not working days.
UK
-
Right-click the company for which you wish to set rules, or left-click the company and click the menu icon
 , then click Create. This opens the Company Order Rules window.
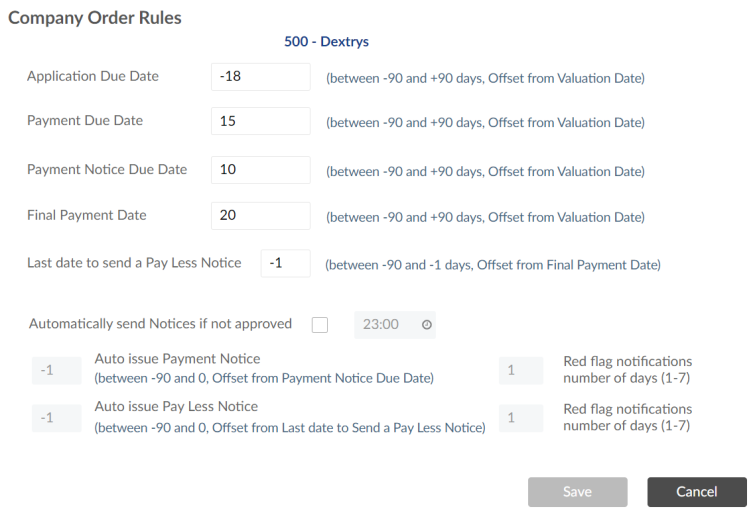
-
Enter the values for each offset in the first five fields. For an in-depth explanation of what the numbers mean, see Default Order Rules.
-
Tick the 'Automatically send Notices if not approved' tick box if you wish to automatically issue notices which have been created but not yet approved before the deadline.
- If you ticked the 'Automatically send Notices if not approved' tick box, complete the remaining fields as follows:
- Click
 to save your changes.
| Time | Enter the time at which the auto-issued notices will be sent out (24-hour clock). |
| Auto issue Payment Notice | This field defines the day on which payment notices will be automatically issued. You must enter a value between -90 and 0. This number is the number of days offset from the Payment Notice Due Date. For example, if you enter -10, unapproved payment notices will be automatically issued ten days before the Payment Notice Due Date. If you enter 0, the notice will be issued on the day of the due date. |
| Auto issue Pay Less Notice | This field defines the day on which pay less notices will be automatically issued. You must enter a value between -90 and 0. This number is the number of days offset from the Last date to send a Pay Less Notice. For example, if you enter -10, unapproved pay less notices will be automatically issued ten days before the Last date to send a Pay Less Notice. If you enter 0, the notice will be issued on the day of the due date. |
| Red flag notifications number of days | When auto-issued notices are sent out, 'red flag' notifications are sent out to MC QS, MC Limited QS and Senior QS users informing them that a payment notice has been ‘Issued Subject to Approval’ and the date by which it must be approved. These fields define how often these notifications are sent. You must enter a number between 1 and 7; 1 means notifications will be sent every day, 2 means notifications will be sent every two days and so on. |
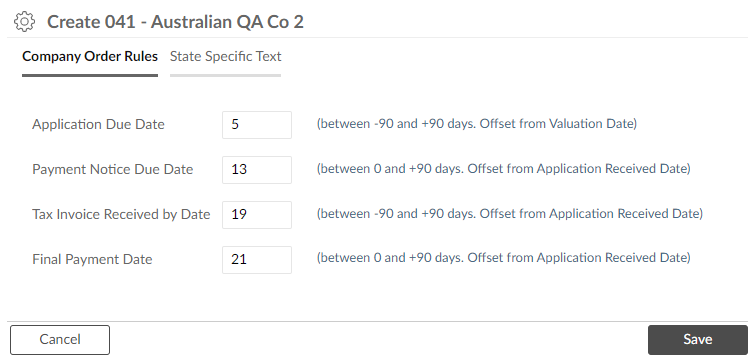
Australia
Company Order Rules
-
Right-click the company for which you wish to set rules, or left-click the company and click the menu icon
, then click Create. - On the Company Order Rules tab, enter the values for each offset in the four fields. For an in-depth explanation of what the numbers mean, see Default Order Rules.
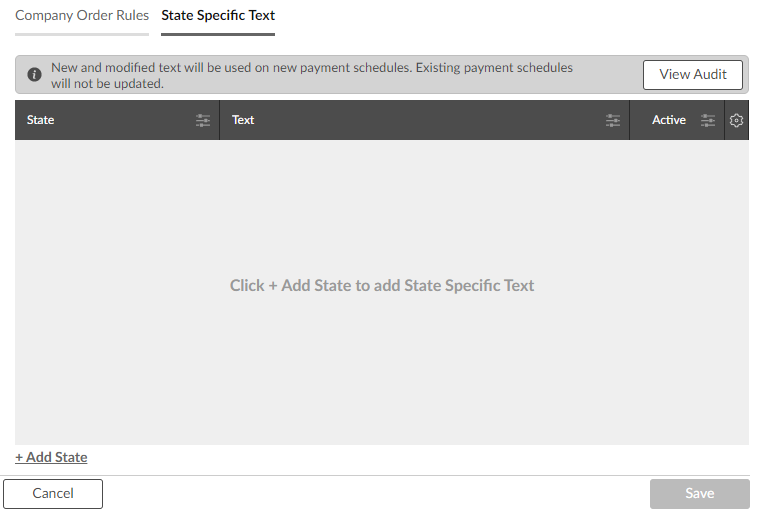
State Specific Text
By default, every printed payment schedule contains the text: "This Payment Schedule is issued under the Security of Payments Act 1999." You can modify this text for payment schedules associated with the selected company on a state-by-state basis, using the State Specific Text tab. Note that changes to payment schedule text apply only to new payment schedules; existing schedules will be unaffected.
-
Open the State Specific Text tab.
- To add text for a state, click + Add State. A new row will be added to the grid.
- Click the State field in the new row to select a state from the drop-down list.
- Click the Text field in the new row to enter the text you wish to add to payment schedules for the selected state.
- Repeat steps 2-4 for as many states as you wish.
- All new entries are active by default. If you wish to deactivate specific text for a state, click the switch in the Active column for that state. Once deactivated, new payment schedules for that state will revert to the default text. Click it again to reactivate it.
- You can see a log of all the changes that have been made to state specific text for this company by clicking View Audit.
- Click
 to save the state specific text.